
Set up Design Control
Design Control is switched on one space at a time, in that space’s own settings. Enabling it starts a health check that installs the configuration the app needs, so you do not have to build the work types, screens, and workflows by hand.
Before you start
You need administrator rights on the space, since the switch lives in Space settings. Design Control needs no other Qity app installed, so there is nothing else to line up first.
Design Control runs on a company-managed space only. The health check reads the space style and fails on a team-managed one, which is not something it can repair.
Enable Design Control for a space
- Open the Jira space you want to use, then go to Space settings.
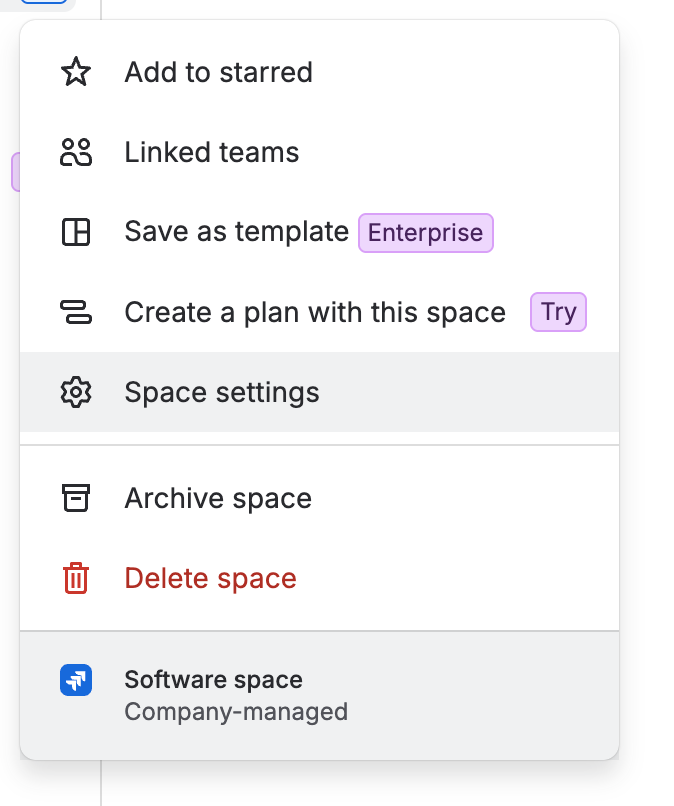
The space menu with Space settings selected. The footer names the space type, which is where you can confirm it is company-managed. - In the settings sidebar, click Apps, then Qity Design Control, then Settings.The Approvals entry below it is the approval configuration, covered further down this page.
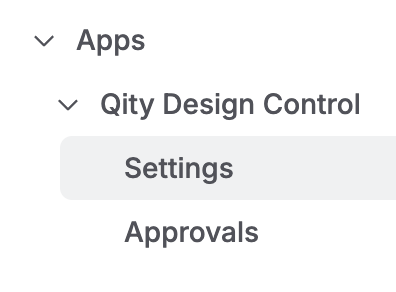
The settings sidebar expanded to Apps, then Qity Design Control, with Settings selected and Approvals below it. - Turn on Enable Qity Design Control for this project.The health check starts on its own as soon as the switch is on. There is nothing to run yourself.
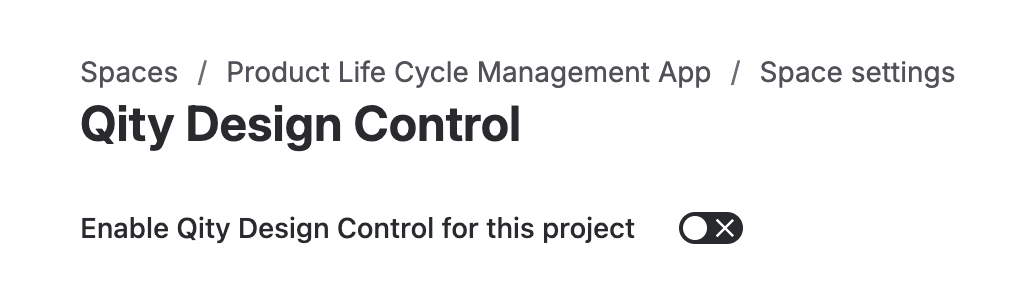
The Qity Design Control settings page with the enable switch still off. - Wait for the health check to finish.It runs 38 checks and names each one as it goes. When it finishes it reports how many ran, passed, and failed.
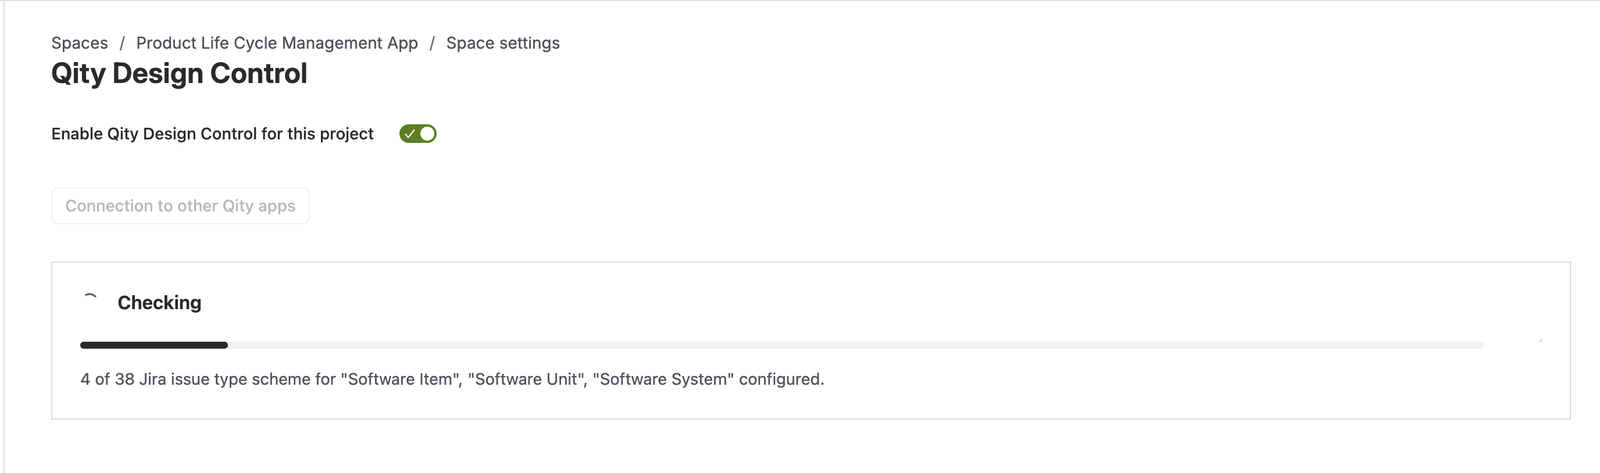
The check in progress, headed Checking, with a progress bar and the check it is on. 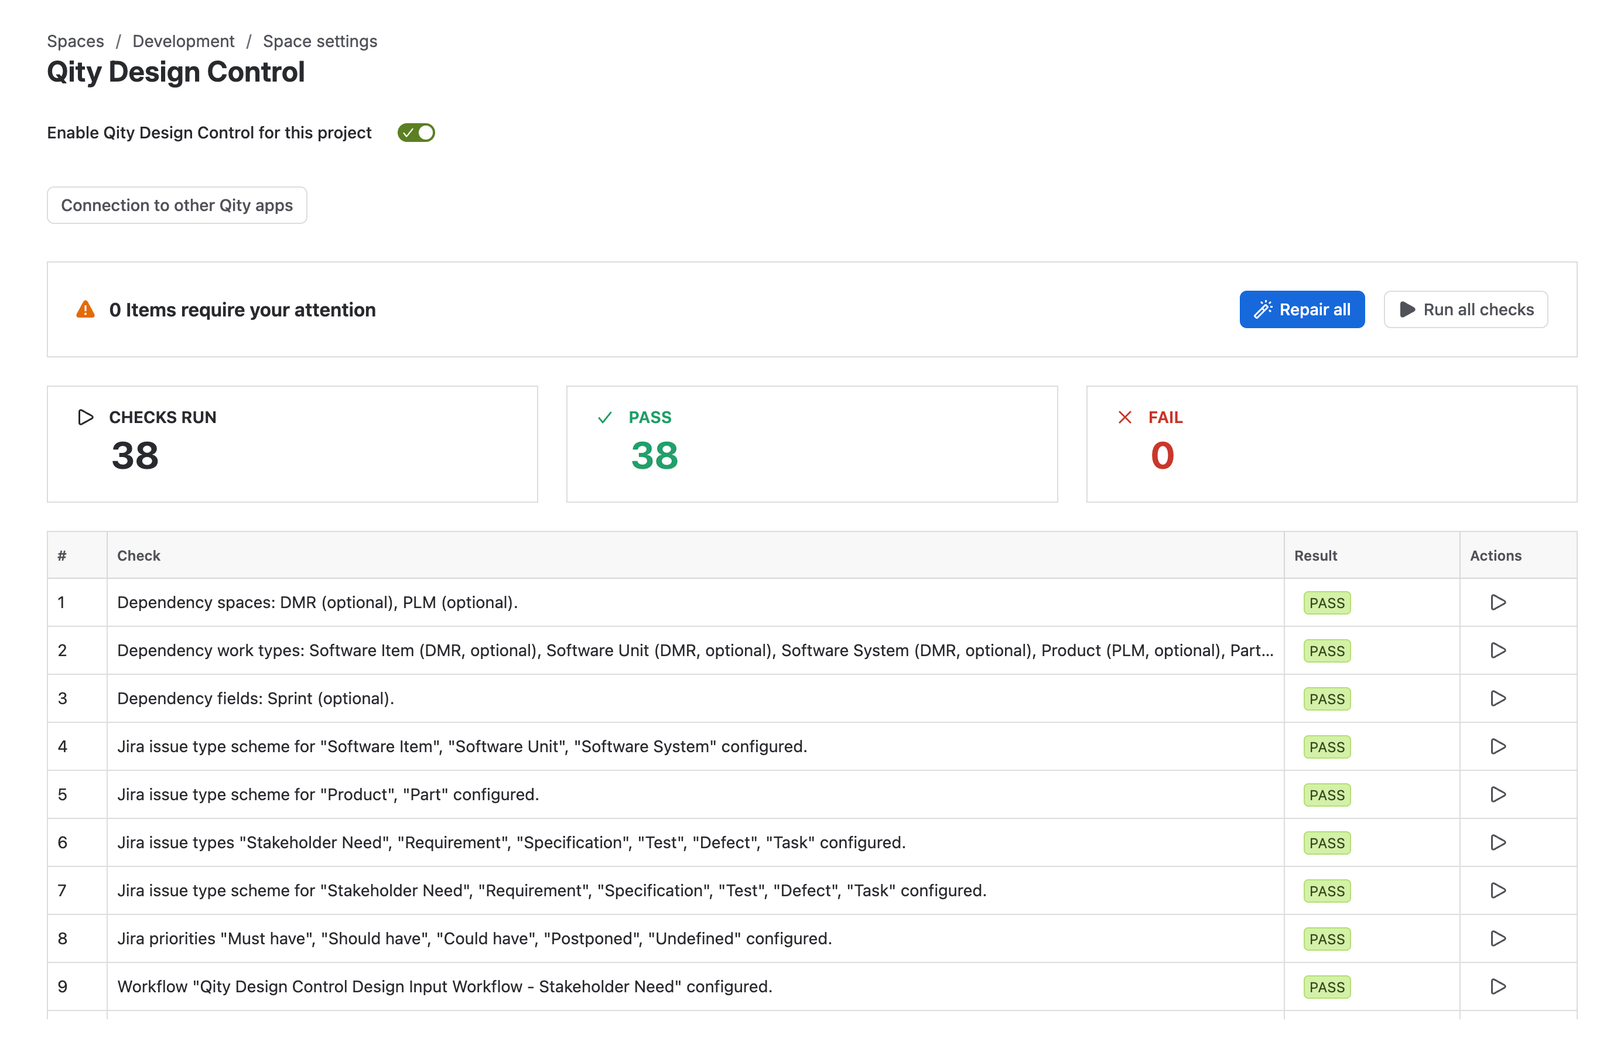
A clean result: 38 checks run, 38 passed, 0 failed, above the full list of checks with a Pass result on each row. - Open the space and select the new Design Control tab.That tab is the space page every guide starts from. See Key concepts & terminology for what each view holds.
With a clean result the space is ready to use. Start with Manage stakeholder needs, the first item in the design chain.
What the health check does
The health check brings the space in line with what Design Control expects. It installs what is missing and corrects what does not match.
| It configures | What Design Control needs it for |
|---|---|
| Work types | One work type per item the app tracks: stakeholder need, requirement, specification, test, defect, and task, each a native Jira work item. |
| Fields | The fields each item type carries. |
| Screens | Which of those fields appear when an item is created, viewed, and edited. |
| Workflows | The statuses and transitions each item type moves through. |
| Work item links | The link types that connect one item to the next, which is what the traceability views read. |
| Priorities | The priority values the views sort and group on: Must have, Should have, Could have, Postponed, and Undefined. |
| Dependencies | Spaces, work types, and fields Design Control can draw on from other Qity apps, such as the PLM space. These are optional, so a space without them still passes. |
If a check fails
A failed check is not something you have to fix by hand. The result counts what needs attention, and every failing row carries its own repair action.
- Read the banner at the top of the result.It counts the items that need attention, with Checks run, Pass, and Fail totals under it, and a Pass or Fail result on every row of the list below.
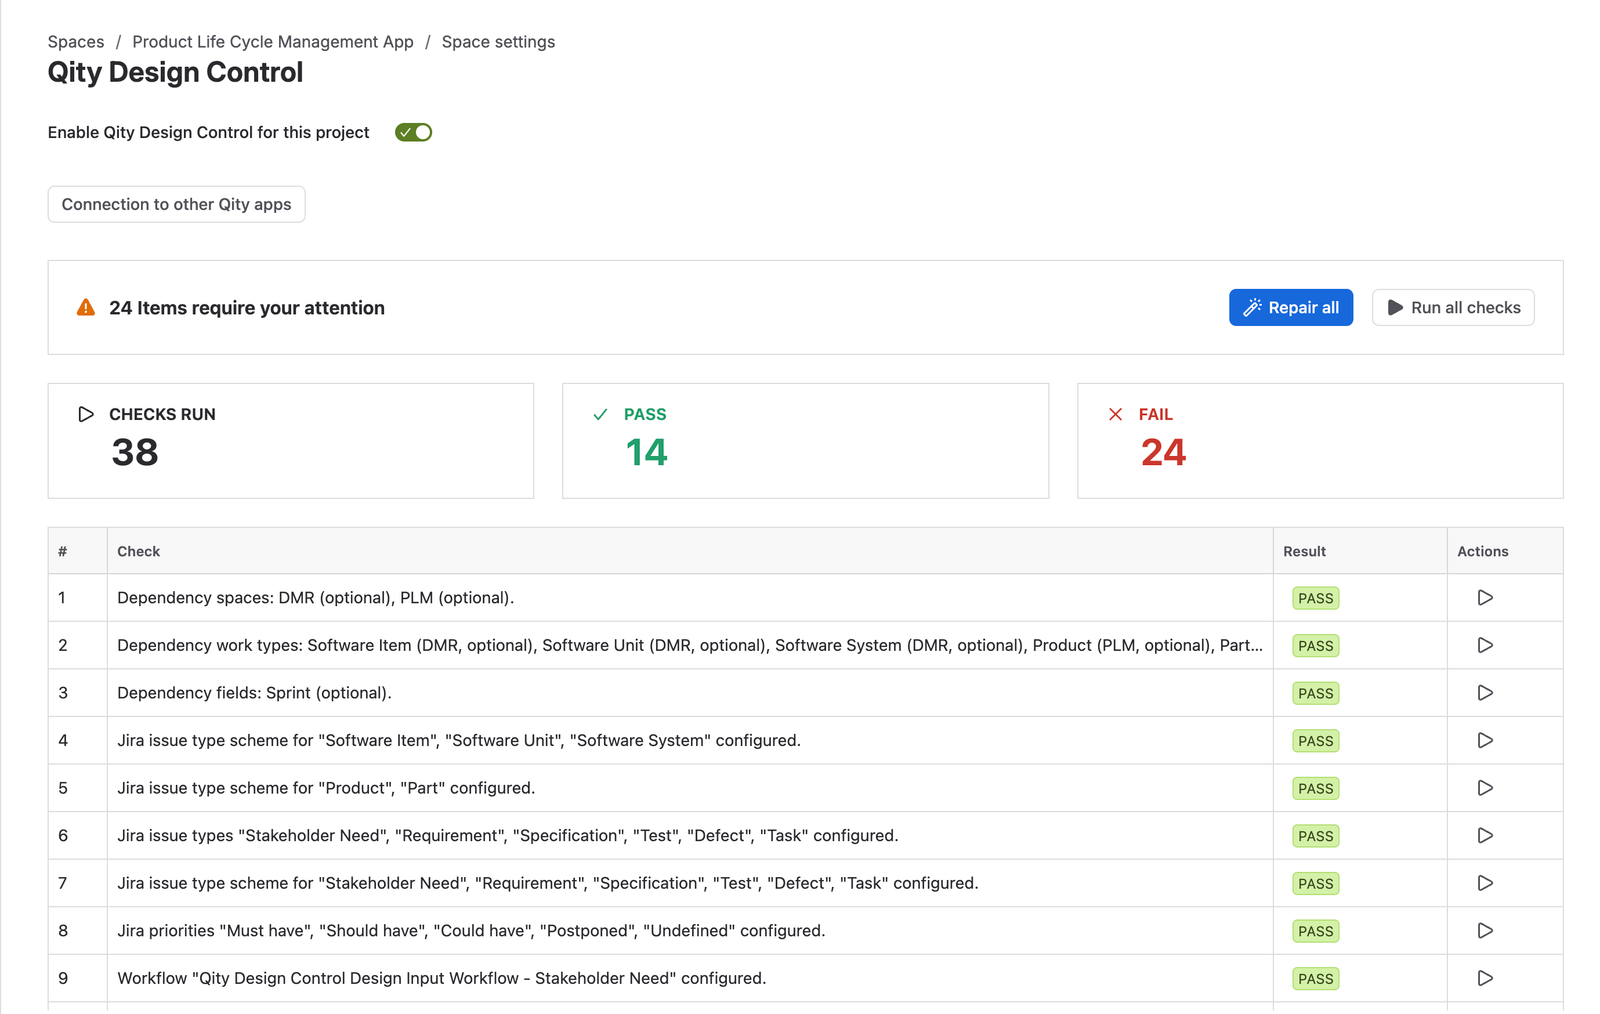
A result with 24 items requiring attention: 38 checks run, 14 passed, 24 failed. The failing rows sit further down the list than this crop shows. - Click Repair all to fix every failing check in one pass.

The Repair all button. - To fix one failure on its own, open the ... menu in the Actions column of that row, then click Repair.The same menu has Run, which re-runs that one check and leaves the others alone.
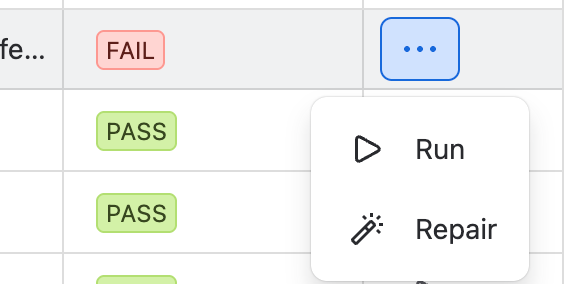
The Actions menu open on a row with a Fail result, offering Run and Repair. - Click Run all checks to confirm the repair worked.A repaired check moves from Fail to Pass and the totals reflect it. Run all checks is also how you re-check a space later, after a Jira administrator edits a shared workflow or screen, for example.
Approvals
An approval is a formal sign-off on a single item. A stakeholder need, a requirement, a specification, or a test is signed off in its own right, by the people named in its Approvers field, so the decision is recorded against that item rather than against a batch or a release.
Approvals are configured per workflow, and how you set them up is yours to decide. Add one approval for each workflow you want a sign-off on.
- In the same Qity Design Control space settings, click Approvals.
- Turn on Enable Approval for this project.
- Click New approval, fill in the five fields, then click Save.The bin icon to the right of an approval removes it.
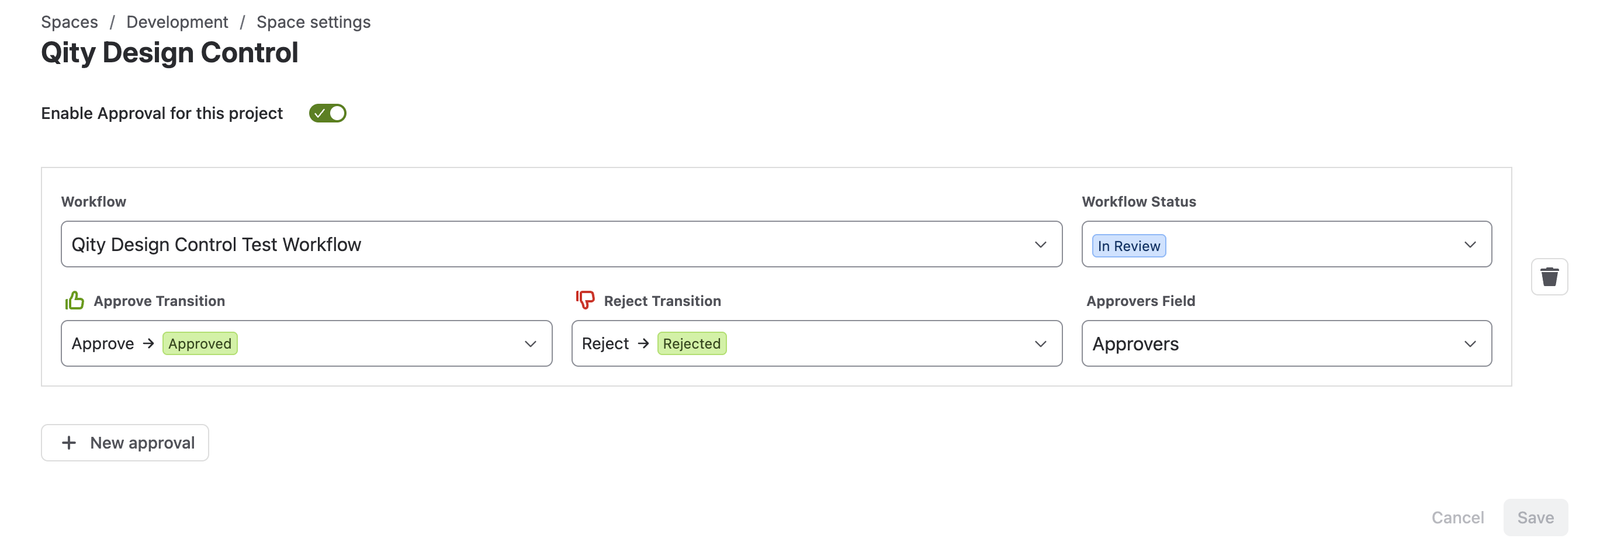
The Approvals page with approvals enabled for the space and one approval set up on the test workflow.
Each approval sets five things:
| Field | What it sets |
|---|---|
| Workflow | The workflow this approval applies to. Each item type moves through its own, so a type has no sign-off until an approval names its workflow. |
| Workflow Status | The status an item waits in while the sign-off is outstanding. |
| Approve Transition | The transition to run when the approval is granted, and the status it moves the item to. |
| Reject Transition | The transition to run when the approval is refused. |
| Approvers Field | The field naming the people whose decision is required. |
The health check does not look at approvals. It sets up the work types, fields, screens, workflows, and links, then leaves the approval configuration to you, so a clean result does not mean a sign-off is in place.